The printable version is no longer supported and may have rendering errors. Please update your browser bookmarks and please use the default browser print function instead.
Brief Setup Instructions
1. Download and install Minecraft
2. Download the one-click installer: polycraft-installer-1.4.11.jar file
3. Make sure your Minecraft profile is edited to use version 1.7.10.
3a. Ensure you have a mods folder in your minecraft installation directory (Mac users, you may need to create one!)
4. If you have a previous version of Polycraft World installed or non-compatible mods, you must navigate to the mods folder and remove those.
Full Setup Instructions - Windows & Mac
Mac users, there is a known bug with our current installer that we are diligently trying to fix (as of 8/23/2018). To fix the freeze while booting Minecraft for the first time after installing PolyCraftWorld, try turning off and on your wifi, rebooting your computer, or re-installing Minecraft.
See below for a detailed walk-through on Polycraft World installation:
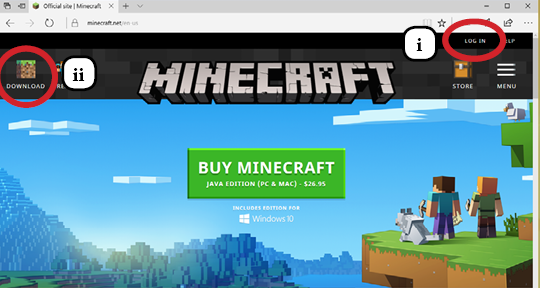
i-ii. Login, Download and Install the Minecraft Launcher from
minecraft.net. Notice you must have purchased a valid copy of Minecraft from Mojang/Microsoft for the Mac or PC before you can play Polycraft World. This mod is not compatible with mobile versions, the Playstation or the Xbox versions.
1. Select Minecraft Launcher Options because you need to run the game at least once to properly setup the .Minecraft folder.

2. Choose the
+ Add New button on the launcher screen. You can optionally enable any of the settings up top, such as historical revisions or Advanced Settings, but these are not necessary.
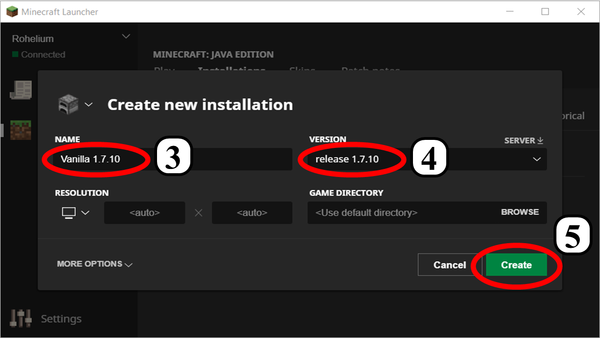
3-5. Select the Minecraft version 1.7.10, which is the version that is compatible with Polycraft World. Call this the Vanilla build. This is necessary to set up map files for 1.7.10. Then click
Save.
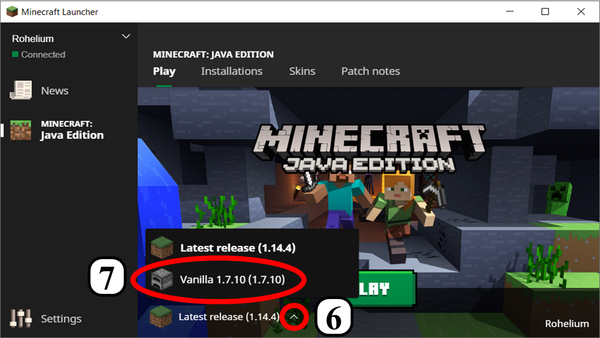
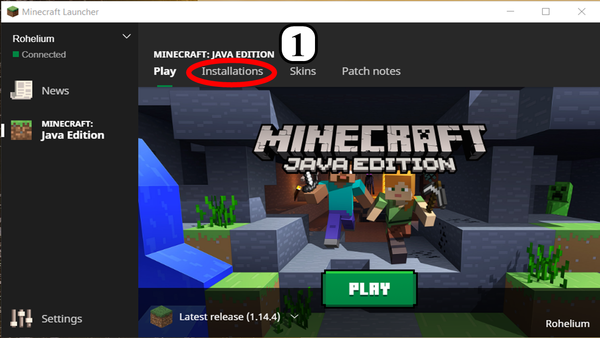
6-7. On the News Tab, Click the Up button next to Play and Choose the Vanilla 1.7.10 build.
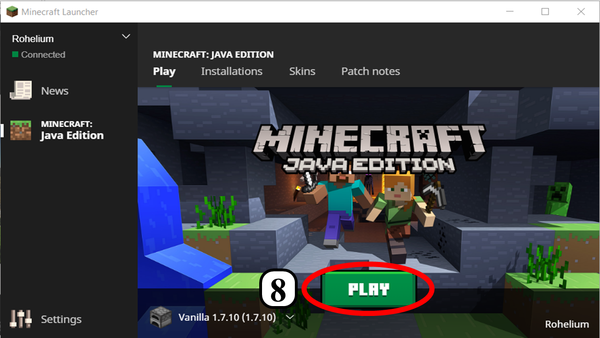
8. Click the big green Play button to launch 1.7.10 to setup the correct files in your .Minecraft folder.
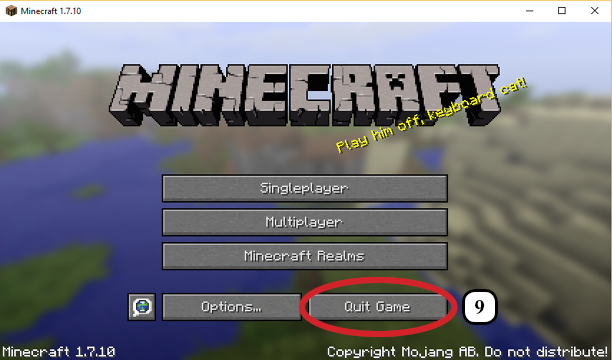
9. Quit out of Minecraft.
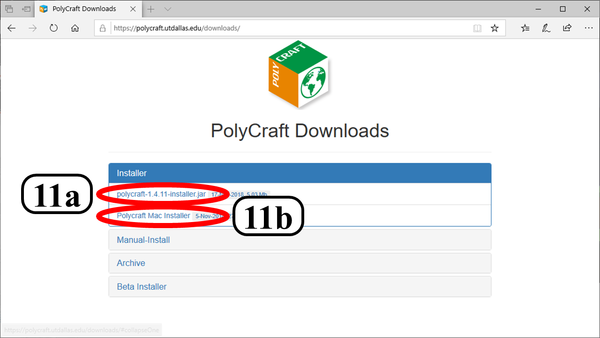
11. Windows users: Download and run the .jar file. Mac users: Download and run the .dmg installer. You have to have the correct version of java installed. Look at
The Java download page and choose the correct version based on your operating system, for example 64-bit Windows offline.
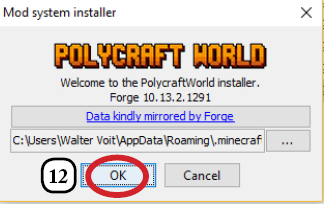
12. Click OK to run the installer. This will add Forge (a version of 1.7.10), the mod itself and our custom Polycraft Resource Pack (32-bit resolution) to your .Minecraft folder, which in Windows systems in located in the %AppData% folder.
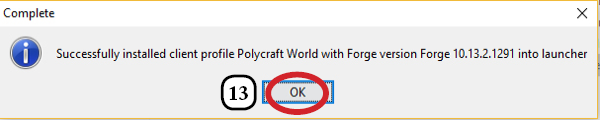
13. Click OK when the Polycraft World mod has been successfully installed.
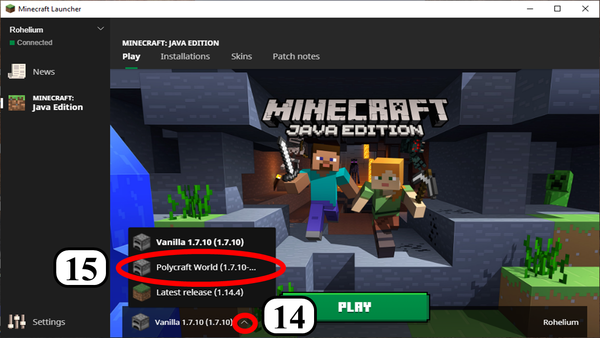
14-15. Launch the Minecraft launcher again and select the
Up arrow next to the Play button and select the 1.7.10-Forge version that helps us run Polycraft World.

16. Hit Play to launch Polycraft World.
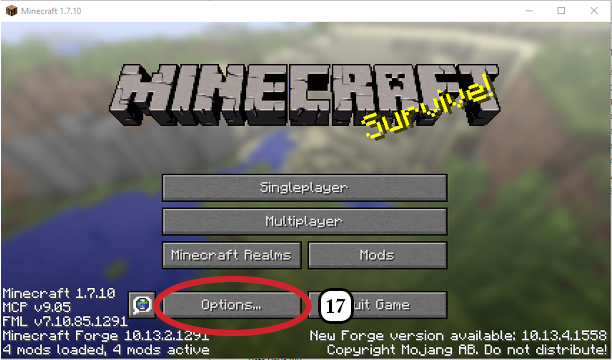
17. Now we are going to enable the Resource Pack. Click on the Options button on the launch screen.
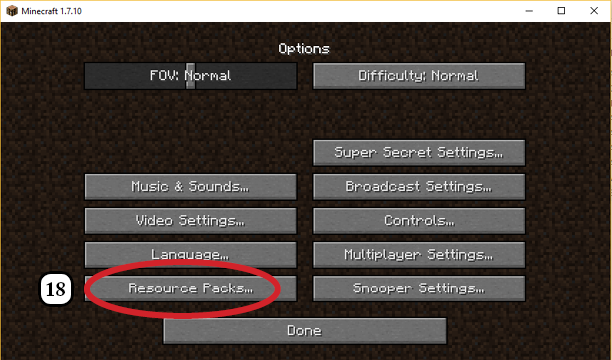
18. Now click on resource packs.
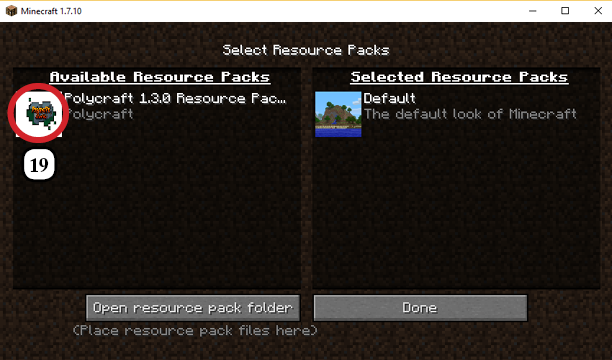
19. Click on the Polycraft World logo, and the Up arrow which is to the left of the Polycraft World texture pack. If you do this correctly, it should move to the right side.

20. Exit back to the Home Minecraft screen.
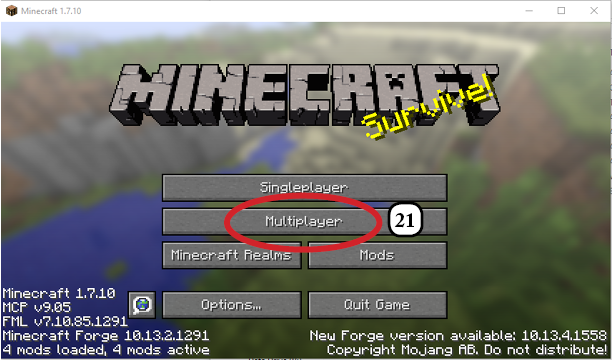
21. Click on the Multiplayer button.
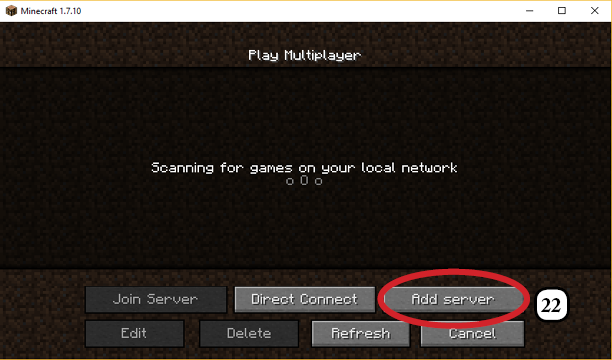
22. Click on the Add Server button.
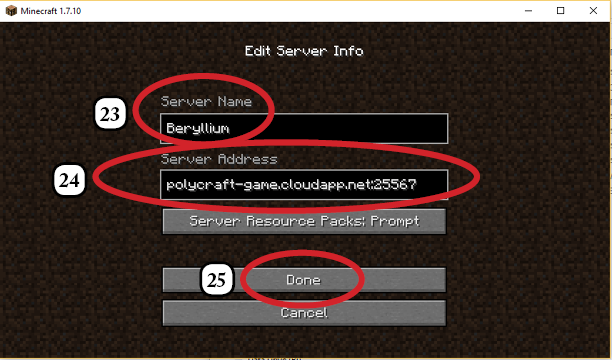
23-25. Choose a name for the server to which you are connecting, which is determined in your online Polycraft World portal. This will be something like Lithium or Beryllium. Then type in the server address which is also found on the portal. This should be something like: polycraft-game.cloudapp.net:25567
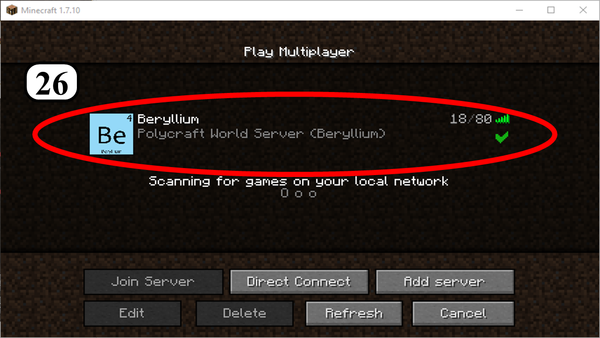
26. Launch Polycraft World on UT Dallas Servers!


